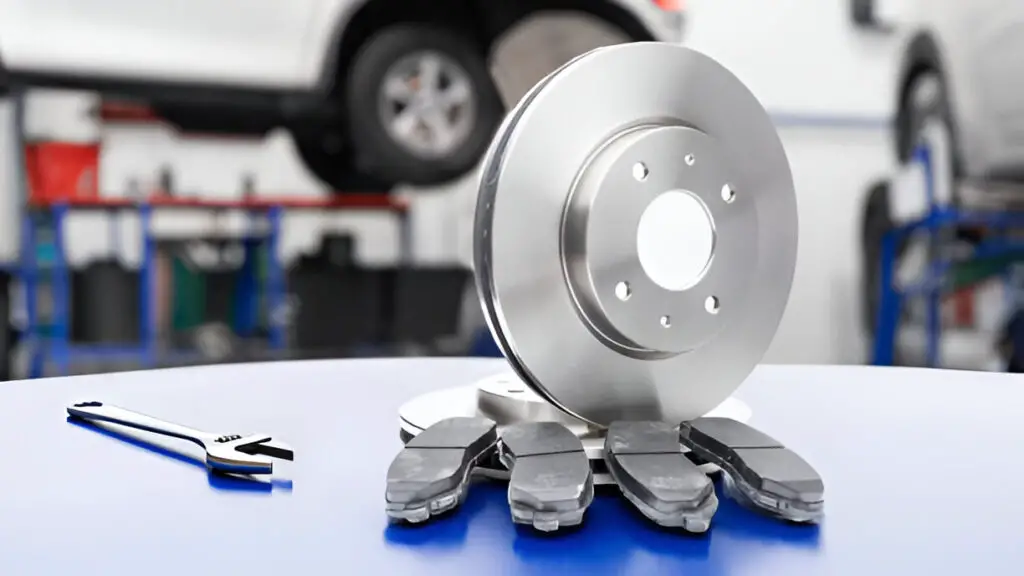
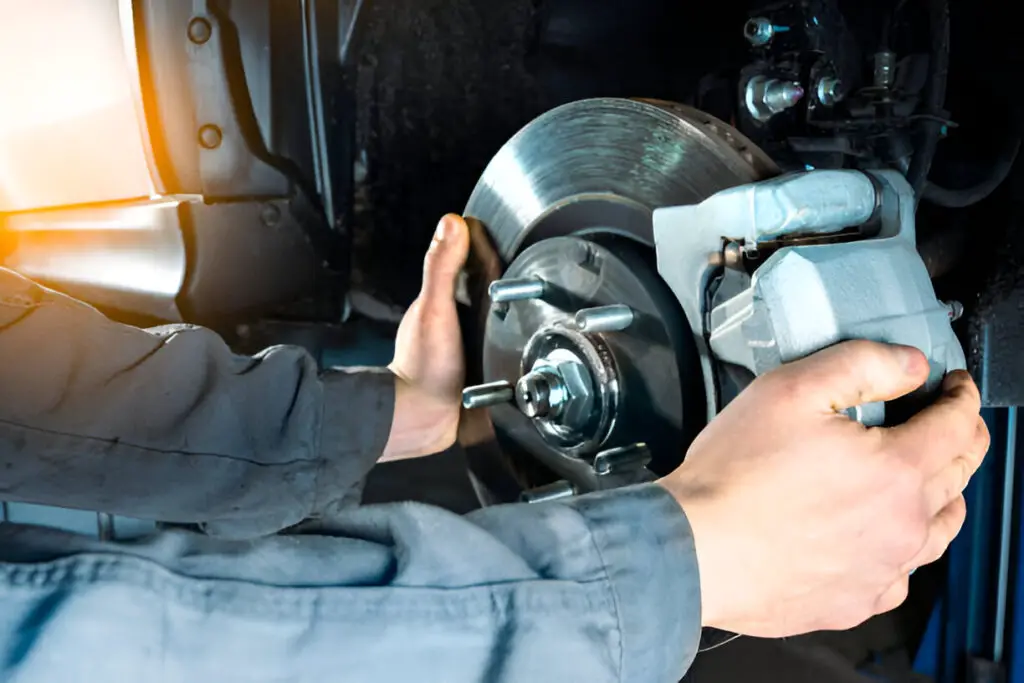
Brake pad assembly involves installing the brake pads, calipers, and rotors to ensure proper braking. It’s essential for safe, efficient vehicle stopping and prevents issues like uneven wear and noise.
Brake pads are one of the most critical components in a vehicle’s braking system, and their proper assembly is crucial for the safety and functionality of any automobile. Whether you’re an enthusiast wanting to learn more about car mechanics or a professional mechanic, understanding brake pad assembly is essential.
In this blog, we’ll dive deep into the brake pad assembly process, its components, its significance, and answer some frequently asked questions.

Contents
What is a Brake Pad Assembly?
The brake pad assembly refers to the installation of the brake pads and related hardware within the braking system of a vehicle. It includes the brake pads themselves, calipers, rotors (or discs), and other associated parts. The assembly plays a vital role in the friction that stops the vehicle when the driver applies the brakes. Understanding the brake pad assembly process can not only help ensure vehicle safety but also extend the life of your braking system.
Components of a Brake Pad Assembly
To understand brake pad assembly, it is essential to be familiar with the parts involved:
Brake Pads
Brake pads are the components that make contact with the brake rotors to create friction, which slows down or stops the vehicle. They are typically made of materials like ceramic, semi-metallic, or organic compounds, depending on the vehicle and driving conditions. High-performance or heavy-duty vehicles may use more robust, heat-resistant materials.
Brake Rotors (Discs)
Brake rotors are metal discs attached to the wheels. When the brake pads clamp down on the rotors, friction is created, which converts kinetic energy into heat and slows the vehicle. Rotors come in various designs, including solid, slotted, and drilled, depending on performance requirements.
Calipers
Brake calipers house the brake pads and hydraulic pistons. They apply pressure to the brake pads when the brake pedal is pressed, forcing the pads to squeeze against the rotor. Calipers can be fixed or floating (sliding) in design, with floating calipers being more common in most vehicles.
Brake Hoses and Hydraulic Pistons
Brake hoses are flexible tubes that carry brake fluid from the master cylinder to the calipers. The hydraulic pistons inside the calipers push the brake pads against the rotors when the fluid is pressurized by pressing the brake pedal.
Brake Hardware
Various small components, such as clips, shims, and wear indicators, make up the brake hardware. These parts ensure that the brake pads remain in place and function correctly, reducing noise and uneven wear. They may also help in heat dissipation.
Brake Fluid
Though not a physical part of the assembly, brake fluid is essential for transmitting the force from the driver’s foot on the brake pedal to the caliper, thus engaging the pads. Brake fluid is typically glycol-based but can also be silicone-based in some applications.
Step-by-Step Brake Pad Assembly Process
The brake pad assembly process involves several steps, each critical to ensuring the proper functioning of the braking system. Here is a breakdown:
Prepare the Vehicle
- Safety First: Ensure the vehicle is parked on a flat surface, and the parking brake is engaged. Use a jack to lift the car and secure it with jack stands.
- Wheel Removal: Use a lug wrench to remove the wheel, giving you access to the brake components.
Inspect the Brake Components
Before installing new brake pads, inspect the condition of the brake rotors, calipers, and hardware. If the rotors are excessively worn, scored, or warped, they should be resurfaced or replaced.
Remove the Old Brake Pads
- Caliper Removal: Using a socket or wrench, remove the caliper bolts that secure the caliper to the rotor. In most vehicles, you’ll need to hang the caliper using a bungee cord or wire to avoid stress on the brake hose.
- Pad Removal: Slide out the old brake pads from the caliper. If the pads are difficult to remove, check for stuck clips or retainers that may need replacing.
Prepare the Caliper and Install New Pads
- Compress the Caliper Pistons: The caliper pistons need to be pushed back into the caliper housing to accommodate the thicker new brake pads. You can use a C-clamp or a dedicated brake caliper tool for this purpose.
- Apply Brake Grease: Apply a high-temperature brake lubricant on the edges of the brake pad backing plate and on the caliper slide pins to prevent squeaking and ensure smooth operation.
- Install New Brake Pads: Slide the new brake pads into place. If the brake hardware includes new clips or shims, ensure they are properly installed before securing the pads.
Reinstall the Caliper
- Mount the Caliper: Once the new pads are in place, reattach the caliper over the brake rotor. Tighten the caliper bolts to the manufacturer’s recommended torque settings.
Check the Brake Rotor
- Resurfacing or Replacement: If necessary, the rotor can be resurfaced to ensure a smooth surface for the new pads. If resurfacing isn’t possible due to rotor wear limits, replace the rotor.
- Check Rotor Alignment: Ensure that the rotor is properly aligned and free of dirt or debris.
Reassemble the Wheel
Once the new brake pads and caliper are securely in place, reattach the wheel. Lower the vehicle and tighten the lug nuts to the correct torque specification.
Test the Brakes
Before driving, press the brake pedal a few times to seat the new brake pads. This will also ensure that the caliper pistons are correctly positioned. Test drive the vehicle at low speeds to confirm that the brakes are functioning properly.
Importance of Proper Brake Pad Assembly
A proper brake pad assembly is vital for vehicle safety and performance. Incorrect assembly can lead to poor braking performance, excessive wear, noise, or even brake failure. Moreover, improper installation can cause uneven pad wear, resulting in premature replacement or rotor damage.

Common Brake Pad Materials
There are many types of brake pads and come in various materials, each offering different advantages and trade-offs:
Ceramic Brake Pads
Ceramic brake pads are known for their quiet operation, low dust generation, and long lifespan. They are excellent for everyday driving but may not provide the stopping power needed for high-performance vehicles.
Semi-Metallic Brake Pads
Semi-metallic pads are composed of a mix of metal fibers and are more durable and heat-resistant than ceramic pads. They are ideal for heavier vehicles or performance driving, but they tend to generate more noise and dust.
Organic Brake Pads
Made from materials like rubber, glass, and Kevlar, organic brake pads are softer and quieter but wear out more quickly than their counterparts. They are usually used in smaller or less powerful vehicles.
Frequently Asked Questions
Here are some FAQs about brake pad assembly :
1. How often should I replace my brake pads?
Brake pads typically last between 30,000 to 70,000 miles, depending on driving habits and the type of material. Check your vehicle’s manual for specific recommendations.
2. Can I replace brake pads myself?
Yes, with the right tools and knowledge, replacing brake pads is a doable task for a home mechanic. However, if you’re unsure, it’s best to have a professional handle the job to ensure safety.
3. What happens if I don’t replace my brake pads?
Failing to replace worn brake pads can lead to rotor damage, increased stopping distances, and potential brake failure, putting you and others on the road at risk.
4. How do I know when my brake pads need replacing?
Common signs include squealing noises, grinding sounds, a spongy brake pedal, or reduced braking performance. Some vehicles also have electronic wear indicators that alert you when it’s time to replace the pads.
5. What type of brake pads should I choose?
The choice depends on your driving style and the vehicle type. Ceramic pads are quieter and last longer, while semi-metallic pads offer better performance for heavier vehicles or aggressive driving.
Conclusion
Knowing brake pad assembly is crucial for maintaining a safe and functional vehicle. Whether you’re replacing brake pads yourself or relying on a professional, knowing the components and steps involved can help ensure a smooth, efficient braking system. Proper brake pad assembly not only ensures vehicle safety but also prolongs the lifespan of your brake system components, giving you peace of mind on the road.