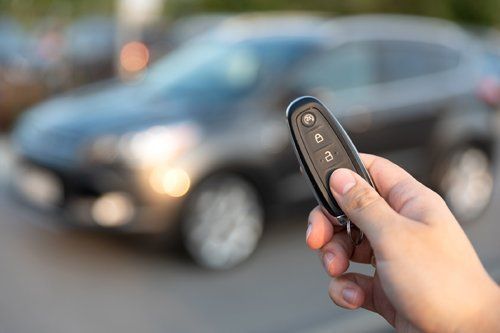
To change the battery in a keyless remote, locate the battery compartment and replace the old battery with a new one. Follow the manufacturer’s instructions for proper installation.
In today’s fast-paced world, keyless remotes have become a common feature in modern vehicles, providing convenience and ease of access for drivers. However, when the battery in your keyless remote starts to run low, knowing how to replace it quickly can save you time and hassle.
By understanding the simple process of changing the battery in your keyless remote, you can ensure that your device continues to function effectively, allowing you to unlock and start your vehicle with ease. Let’s explore the steps involved in changing the battery in a keyless remote to keep your vehicle’s keyless entry system in optimal working condition.

Credit: www.letcherbros.com
Contents
Why Change the Battery in Your Keyless Remote?
- Maintaining Functionality: A dead battery can prevent you from unlocking or starting your vehicle, leaving you stranded.
- Convenience: Regularly changing the battery ensures that your keyless remote works smoothly without any hiccups.
- Security: An operational keyless remote helps maintain your vehicle’s security features, such as remote locking and alarm activation.
When to Replace the Battery
- Weak Signal: If you notice the range of your keyless remote is decreasing, it may be time to replace the battery.
- Intermittent Function: If the remote works intermittently or only after multiple presses, the battery is likely low.
- Warning Light: Some vehicles will display a warning light on the dashboard indicating a low battery in the keyless remote.

Credit: www.keylessshop.com
Changing Battery in Keyless Remote
First of all you should gather the right tools when changing the battery in a keyless remote. Make sure to have following tools –
- Replacement battery (consult your vehicle’s manual for the correct type, usually a CR2032 or similar)
- Small flat-head screwdriver or a coin
- Clean cloth or gloves
Steps to Change the Battery in Keyless Remote
Follow the steps below to do the job successfully –
- Identify the Battery Type:
- Consult the Manual: Check your vehicle’s owner’s manual to find the correct battery type for your keyless remote.
- Read the Key Fob: Often, the battery type is printed on the back of the key fob or inside the battery compartment.
- Open the Keyless Remote:
- Locate the Seam: Most keyless remotes have a seam around the edge where the two halves of the casing meet.
- Insert the Tool: Use a small flat-head screwdriver or a coin to gently pry open the casing. Insert the tool into the seam and twist carefully to separate the two halves.
- Avoid Damage: Be gentle to avoid damaging the casing or internal components.
- Remove the Old Battery:
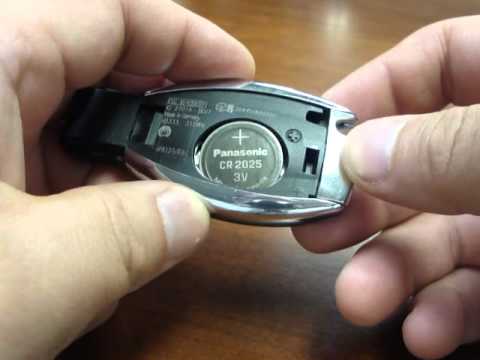
- Identify the Battery: Once the key fob is open, locate the battery. It will usually be held in place by a small metal clip or plastic housing.
- Remove the Battery: Use the screwdriver or your fingers to carefully lift the battery out of its compartment. Take note of the battery’s orientation (positive and negative sides) for proper installation of the new one.
- Install the New Battery:
- Insert the New Battery: Place the new battery into the compartment, ensuring it is oriented correctly according to the markings inside the key fob (positive side up or down).
- Secure the Battery: Ensure the battery is firmly seated and any clips or housings are properly in place.
- Reassemble the Keyless Remote:
- Align the Halves: Align the two halves of the key fob casing.
- Snap Together: Press the halves together until they snap securely into place. Ensure there are no gaps around the seam.
- Test the Keyless Remote:
- Check the Functions: Test all functions of the keyless remote, including locking, unlocking, and remote start (if applicable), to ensure the new battery is working correctly.

Tips for a Successful Battery Replacement
- Use the Correct Battery: Using the wrong type of battery can damage the key fob or cause it to malfunction.
- Handle with Care: Keyless remotes are delicate electronic devices. Handle the internal components gently to avoid damage.
- Keep It Clean: Use a clean cloth or gloves to avoid getting dirt or oils from your fingers on the battery or electronic contacts.
- Dispose of the Old Battery Properly: Batteries contain harmful chemicals and should be disposed of according to local regulations. Many stores that sell batteries also offer recycling services.
Frequently Asked Questions
Here are some FAQs about how to replace battery in keyless remote –
How Do I Know If My Keyless Remote Needs A New Battery?
If your keyless remote is not responding or has a weak signal, it’s likely time to replace the battery.
What Type Of Battery Does My Keyless Remote Use?
Most keyless remotes use a CR2032 lithium coin battery. However, it’s always best to check your remote’s manual or the manufacturer’s website for the exact battery type.
How Often Should I Change The Battery In My Keyless Remote?
On average, keyless remote batteries last about 2-3 years. However, if you notice a decrease in range or responsiveness, it’s a good idea to replace the battery sooner.
Can I Change The Battery In My Keyless Remote Myself?
Yes, changing the battery in your keyless remote is typically a simple DIY task. Just make sure you have the correct battery type and follow the instructions in your remote’s manual.
What Are The Steps To Change The Battery In My Keyless Remote?
To change the battery in your keyless remote, locate the battery compartment, remove the old battery, insert the new battery with the correct orientation, and then close the battery compartment securely.
Conclusion
Changing the battery in your keyless remote is a simple and cost-effective way to ensure the smooth functioning of your vehicle. By following these easy steps, you can avoid the inconvenience of a dead remote. Regular maintenance of your keyless remote will save you time and money in the long run.