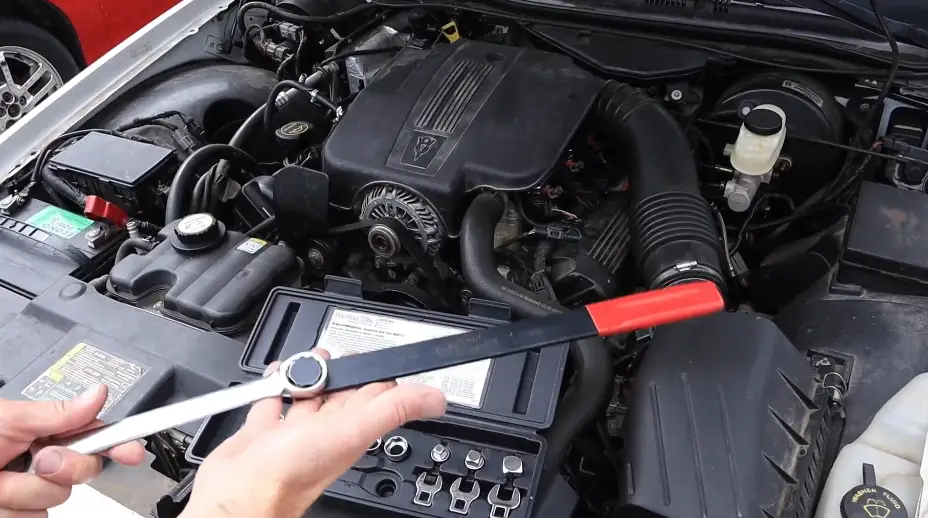
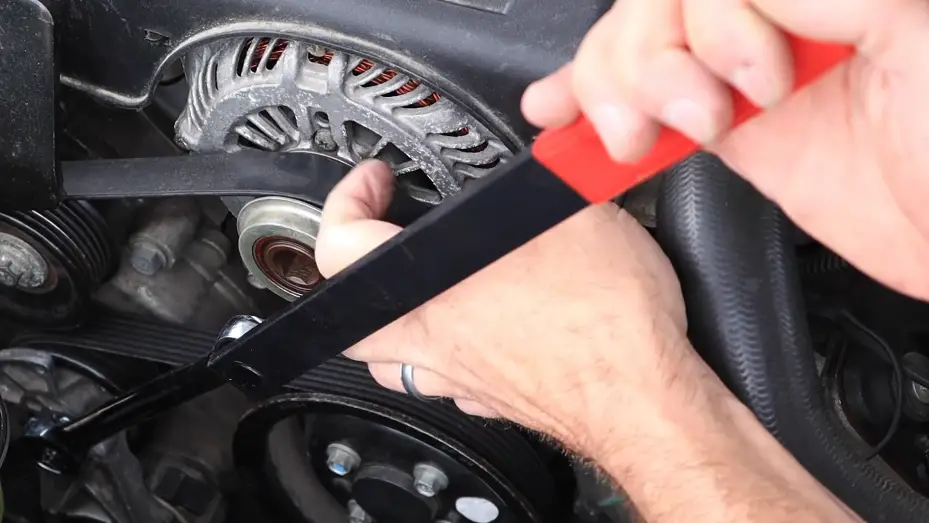
Attach the serpentine belt tool to the tensioner and apply pressure to release tension. Remove the belt, install the new one following the routing diagram, and ensure it’s seated properly. Release the tensioner slowly and test the belt’s operation.
The serpentine belt is a critical component of a car’s engine system, responsible for powering essential accessories like the alternator, power steering pump, air conditioning compressor, and more. When the belt becomes worn or damaged, replacing it is essential to avoid breakdowns or system failures. This process often requires using a serpentine belt tool, a specialized instrument designed to make the task easier and safer.
In this guide, we’ll dive into the step-by-step process of using a serpentine belt tool effectively, provide tips for success, and answer frequently asked questions.

Contents
- 1 What Is a Serpentine Belt Tool?
- 2 When Do You Need a Serpentine Belt Tool?
- 3 How to Use a Serpentine Belt Tool: Step-by-Step
- 3.1 Step 1. Gather Tools and Supplies
- 3.2 Step 2. Consult Vehicle’s Manual
- 3.3 Step 3. Inspect the Belt
- 3.4 Step 4. Locate the Tensioner
- 3.5 Step 5. Position the Serpentine Belt Tool
- 3.6 Step 6. Release the Tension
- 3.7 Step 7. Remove the Belt
- 3.8 Step 8. Install the New Belt
- 3.9 Step 9. Check Work
- 3.10 Step 10. Test the Installation
- 4 Tips for Success
- 5 Frequently Asked Questions
- 6 Conclusion
What Is a Serpentine Belt Tool?
A serpentine belt tool is a device used to release tension on the belt tensioner, a spring-loaded component that keeps the serpentine belt taut. These tools come in various designs, including:
- Tensioner wrenches: Long, slim wrenches with interchangeable sockets or crowfoot attachments.
- Tensioner bars: Sturdy metal bars with a fixed or adjustable head designed to fit into the tensioner.
- Ratchets and breaker bars: Common tools used with an appropriately sized socket to manipulate the tensioner.
The goal of the tool is to provide enough leverage to compress the tensioner, allowing the serpentine belt to be removed or installed.
When Do You Need a Serpentine Belt Tool?
A serpentine belt tool is needed in these scenarios:
- Replacing the serpentine belt: Over time, belts wear out and need replacement. The tool helps you safely access and remove the belt.
- Diagnosing belt-related issues: If the belt squeals, slips, or shows signs of damage, the tool can help you inspect or adjust it.
- Replacing components: Many components powered by the serpentine belt, such as the alternator, require belt removal for access.
How to Use a Serpentine Belt Tool: Step-by-Step
Using a serpentine belt tool is easy and helps ensure proper maintenance of your vehicle’s belt system. Follow these step-by-step instructions:
Step 1. Gather Tools and Supplies
Before starting, ensure you have the following items:
- Serpentine belt tool (tensioner wrench, bar, or suitable alternative)
- New serpentine belt (if replacing)
- Vehicle-specific tools (socket set, screwdriver, etc.)
- Gloves and safety goggles
- Flashlight (if working in a poorly lit area)
Step 2. Consult Vehicle’s Manual
Refer to your vehicle’s service manual for:
- The location of the serpentine belt and tensioner.
- The serpentine belt routing diagram (usually printed on a sticker under the hood or in the manual).
- Specific instructions or torque specifications.
Step 3. Inspect the Belt
Check the serpentine belt for cracks, fraying, or uneven wear. If it shows significant damage, it’s time for a replacement.
Step 4. Locate the Tensioner
Find the belt tensioner, a pulley attached to a spring mechanism. It’s usually located along the serpentine belt’s path and is the key to loosening or tightening the belt. Read more about Serpentine Belt Too Tight Symptoms.
Step 5. Position the Serpentine Belt Tool
Attach the serpentine belt tool to the tensioner:
- Select the correct attachment (socket, crowfoot, or fixed head) based on the tensioner bolt or fitting.
- Insert the tool into the tensioner, ensuring a snug fit.
Step 6. Release the Tension
Apply pressure to the tool, rotating it in the direction indicated in your manual (typically clockwise or counterclockwise). This action compresses the tensioner spring, creating slack in the belt.
Pro Tip: Use steady, controlled force to avoid damaging the tensioner or slipping off the bolt.
Step 7. Remove the Belt
While holding the tensioner in place, slide the serpentine belt off one of the pulleys. Slowly release the tensioner back to its resting position.
Step 8. Install the New Belt
Follow these steps to install a new serpentine belt:
- Compare the old and new belts to ensure they’re the same length and width.
- Refer to the belt routing diagram to correctly position the belt around the pulleys.
- Use the serpentine belt tool to compress the tensioner again.
- Slide the belt onto the final pulley, ensuring it’s seated correctly on all pulleys.
Step 9. Check Work
Before starting the engine:
- Double-check the belt routing against the diagram.
- Ensure the belt is seated evenly in all pulley grooves.
Step 10. Test the Installation
Start the engine and observe the belt for proper operation. Listen for unusual noises and ensure the belt runs smoothly.

Tips for Success
Here are some tips for success when using a serpentine belt tool:
- Use the right tool: A serpentine belt tool offers better access and leverage than standard wrenches in tight spaces.
- Take photos: If a routing diagram isn’t available, take photos of the belt’s path before removal.
- Inspect related components: Check pulleys, tensioner, and idler bearings for wear or damage.
- Work in a safe environment: Ensure the engine is off and cool before starting. Keep loose clothing and hair away from moving parts.
Frequently Asked Questions
Here are some FAQs about using a serpentine belt tool –
1. What if I don’t have a serpentine belt tool?
If you don’t have a specialized serpentine belt tool, you can use a long-handled ratchet or breaker bar with the appropriate socket. However, these may not provide the same level of access or leverage in tight spaces.
2. How do I know if my tensioner is bad?
Signs of a failing tensioner include:
- Belt squealing or slipping.
- Visible wear on the tensioner pulley.
- Difficulty maintaining belt tension.
If the tensioner feels loose or doesn’t return to its resting position, it may need replacement.
3. How often should I replace my serpentine belt?
Most serpentine belts last 60,000–100,000 miles, but check your vehicle’s maintenance schedule for specific recommendations. Regular inspections can help identify wear early.
4. Can I reuse an old serpentine belt?
Reusing an old belt is not recommended unless it’s in excellent condition and less than a few years old. Even minor wear can lead to belt failure.
5. What should I do if the belt keeps slipping off?
If the belt keeps slipping, inspect:
- The belt routing for errors.
- The tensioner for wear or damage.
- Pulleys for misalignment or debris.
Correct any issues before reinstalling the belt.
Conclusion
Using a serpentine belt tool is an essential skill for DIY car enthusiasts and mechanics alike. This tool simplifies the process of removing and installing serpentine belts, ensuring proper tension and alignment. By following the steps outlined in this guide and observing safety precautions, you can confidently maintain or replace your serpentine belt, extending the life of your vehicle and its accessories.
Remember, routine inspections and timely replacements are key to preventing belt-related issues and keeping your car running smoothly.