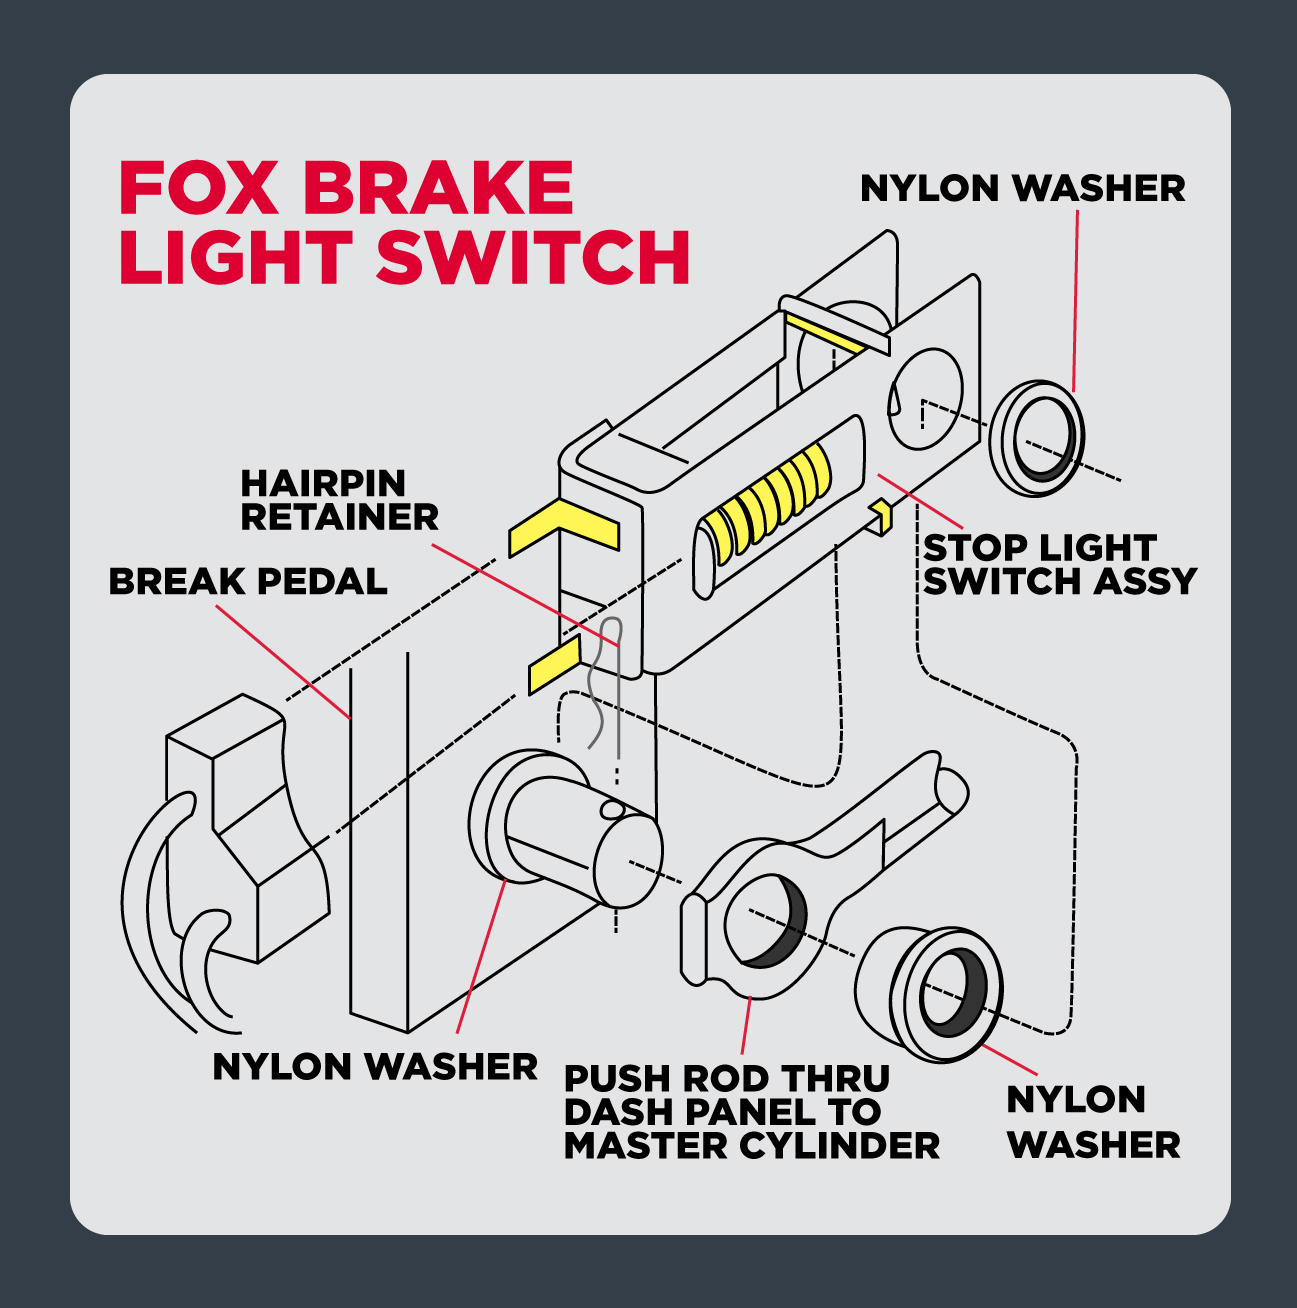
To install a brake light switch, locate the switch near the brake pedal and disconnect the wiring harness. Remove the old switch, replace it with the new one, and reconnect the wiring harness.
The brake light switch is a small but critical component in your vehicle’s braking system. It’s responsible for activating the brake lights when you press the brake pedal, alerting other drivers that you are slowing down or stopping. A malfunctioning brake light switch can lead to safety issues, as your brake lights may not illuminate when needed, increasing the risk of rear-end collisions.
In this guide, we will cover everything you need to know about brake light switch installation, including when to replace it, the tools you’ll need, and a step-by-step process to install a new switch.

Credit: www.oznium.com
Contents
Brake Light Switch
The brake light switch is typically mounted near the top of the brake pedal arm, where it can easily detect when the pedal is pressed. When you press the brake pedal, the switch closes the circuit, allowing electrical current to flow to the brake lights. In modern vehicles, the brake light switch may also interact with other systems, such as cruise control, anti-lock brakes (ABS), and the vehicle’s computer.
Signs of a Faulty Brake Light Switch
Common sign of faulty brake light switch –
- Brake Lights Not Working: The most obvious sign is when the brake lights fail to illuminate when you press the pedal.
- Cruise Control Issues: If your vehicle’s cruise control system suddenly stops working, it could be due to a faulty brake light switch.
- ABS Warning Light: In some cases, a malfunctioning brake light switch may trigger the ABS warning light on your dashboard.
- Difficulty Shifting Out of Park: In automatic transmissions, the brake light switch may also be linked to the shift interlock system, preventing the shifter from moving out of the park position without pressing the brake pedal.
Brake Light Switch Installation
Before you begin the installation process, gather the following tools and materials:
- New brake light switch (ensure it’s the correct part for your vehicle’s make and model)
- Screwdriver set
- Wrench or socket set
- Pliers
- Flashlight (for better visibility under the dashboard)
- Electrical contact cleaner (optional)
Step-by-Step Guide to Installing a Brake Light Switch
The brake light switch is responsible for activating the brake lights when you press the brake pedal. If your brake lights are not functioning properly, it may be time to replace the switch. Follow the steps below to complete the installation:
Step 1: Locate the Brake Light Switch
The brake light switch is typically located near the top of the brake pedal arm, under the dashboard. You may need to contort your body slightly to see it clearly, so using a flashlight can help.
Step 2: Disconnect the Battery
To avoid any electrical mishaps, it’s advisable to disconnect the negative terminal of the battery. This ensures that no current flows through the electrical system while you work.
Step 3: Remove the Old Brake Light Switch
- Unplug the Electrical Connector: Carefully disconnect the electrical connector from the brake light switch. If the connector is stuck, you can use a flathead screwdriver or pliers to gently pry it off.
- Remove the Switch: Depending on your vehicle, the brake light switch may be held in place by a retaining clip, bolt, or screw. Use the appropriate tool to remove the fastener and take out the old switch.
Step 4: Install the New Brake Light Switch
- Position the New Switch: Align the new brake light switch with the mounting hole on the brake pedal arm. Ensure that it is positioned correctly so that it can detect when the pedal is pressed.
- Secure the Switch: Use the retaining clip, bolt, or screw to secure the new switch in place. Be careful not to overtighten, as this could damage the switch or misalign it.
- Reconnect the Electrical Connector: Plug the electrical connector back into the new switch. Make sure it clicks into place and is secure.
Step 5: Test the Brake Light Switch
- Reconnect the Battery: Reattach the negative terminal of the battery.
- Test the Brake Lights: Press the brake pedal and have someone stand behind the vehicle to check if the brake lights illuminate. Alternatively, you can back the vehicle up to a reflective surface, such as a garage door, to see if the lights come on.
- Check Other Functions: If your vehicle’s cruise control, ABS, or shift interlock system was affected by the faulty switch, test these systems as well to ensure they are functioning correctly.
Step 6: Reassemble and Clean Up
Once you’ve confirmed that the new brake light switch is working properly, reassemble any panels or covers you may have removed during the installation process. Use electrical contact cleaner to clean any connections if necessary.

Credit: lmr.com
Frequently Asked Questions
Here are some FAQs about the brake light switch installation
1. How do I know if my brake light switch is faulty?
Common symptoms of a faulty brake light switch include brake lights that don’t illuminate when the pedal is pressed, cruise control failure, an ABS warning light, or difficulty shifting out of park in vehicles with automatic transmissions.
2. Can I drive with a faulty brake light switch?
It’s not recommended to drive with a faulty brake light switch because your brake lights may not work, increasing the risk of rear-end collisions. Additionally, other systems like cruise control and ABS may be affected.
3. How long does it take to replace a brake light switch?
Replacing a brake light switch is a relatively quick task, typically taking about 15 to 30 minutes, depending on your vehicle’s design and your familiarity with the process.
4. Is it necessary to disconnect the battery when replacing the brake light switch?
Yes, disconnecting the battery is a safety precaution to prevent electrical shocks or accidental short circuits while working on the vehicle’s electrical system.
5. Can a faulty brake light switch affect the transmission?
In vehicles with automatic transmissions, the brake light switch can be linked to the shift interlock system, which prevents the shifter from moving out of the park position unless the brake pedal is pressed. A faulty switch can cause issues with shifting out of park.
Conclusion
Installing a new brake light switch is a straightforward yet essential task that can significantly impact your vehicle’s safety and functionality. By following this step-by-step guide, you can replace a faulty brake light switch and ensure that your brake lights work properly, along with any other systems linked to the switch.