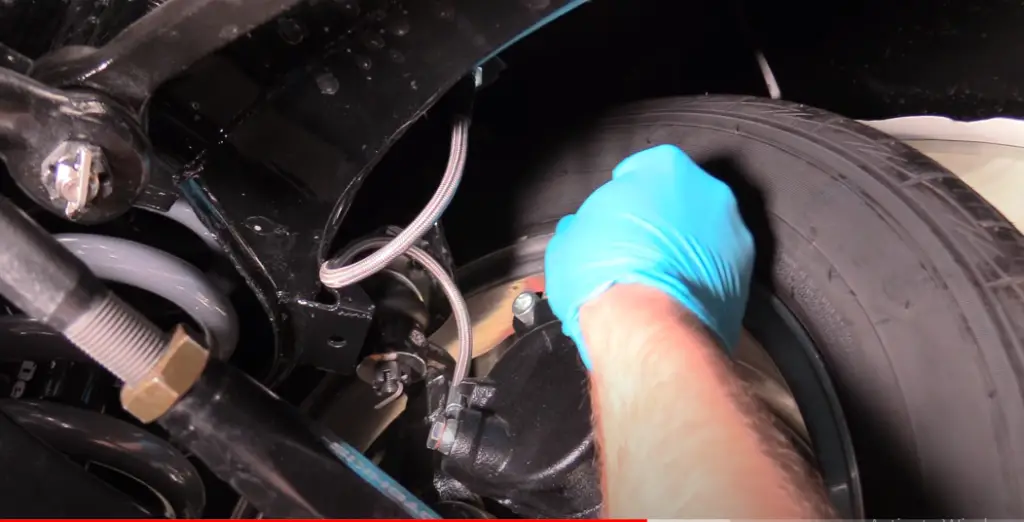
Bleeding the brakes is an essential maintenance task that ensures your braking system is free of air bubbles, providing reliable performance and safety. While traditional brake bleeding is straightforward, bleeding Anti-lock Braking System (ABS) brakes can be a bit more complex due to the additional components and the need to ensure the ABS module is also free of air. This guide will walk you through the process of bleeding ABS brakes step-by-step.

Contents
Why Bleed ABS Brakes?
Air in the brake lines can lead to a spongy brake pedal and reduced braking efficiency. In ABS systems, air can become trapped in the ABS module, leading to potential brake failure. Regular bleeding ensures optimal brake performance and safety.
How to Bleed ABS Brakes
Properly bleeding ABS brakes ensures that your braking system is free of air bubbles, maintaining optimal performance and safety. This guide will take you through the step-by-step process of bleeding ABS brakes, from preparation to execution, ensuring you can confidently perform this essential task on your own vehicle
Tools and Materials Needed
- Brake fluid (consult your vehicle’s manual for the correct type)
- Brake bleeder kit (manual or vacuum)
- Wrench set
- Clear tubing
- Catch container
- Jack and jack stands
- Lug wrench
- Safety glasses and gloves
- ABS scan tool (for some vehicles)
Preparation Steps
- Consult the Vehicle Manual: Before starting, read your vehicle’s service manual for specific instructions and safety precautions related to your ABS system.
- Safety First: Wear safety glasses and gloves to protect against brake fluid, which is corrosive.
- Elevate the Vehicle: Use a jack to lift the vehicle and secure it on jack stands. Remove all four wheels to access the brake calipers.
- Check Brake Fluid: Ensure the brake fluid reservoir is full. You’ll need to keep an eye on this throughout the process to prevent it from running dry, which could introduce more air into the system.
Step-by-Step Guide to Bleeding ABS Brakes
Follow the steps below to bleed abs brake –
Step 1: Start with the Farthest Wheel
- Identify the Bleeding Sequence: Typically, you start with the wheel farthest from the master cylinder, usually the rear passenger side. Refer to your vehicle’s manual for the correct sequence.
- Attach Clear Tubing: Place one end of the clear tubing over the bleeder screw and the other end into the catch container.
- Open the Bleeder Valve: Use a wrench to open the bleeder valve slightly.
Step 2: Bleeding Process
- Pump the Brake Pedal: Have an assistant pump the brake pedal several times and then hold it down.
- Open the Bleeder Screw: With the brake pedal held down, open the bleeder screw to release fluid and air. Close the screw before your assistant releases the pedal.
- Repeat: Repeat this process until no air bubbles are visible in the fluid flowing through the tubing. Keep an eye on the brake fluid level in the reservoir and top it up as necessary.
Step 3: Repeat for All Wheels
- Continue Bleeding: Move to the next wheel in the sequence (rear driver side, front passenger side, front driver side) and repeat the bleeding process.
- Monitor Fluid Levels: Always ensure the brake fluid reservoir is topped up to avoid introducing air into the system.
Step 4: Bleeding the ABS Module
For some vehicles, especially those with complex ABS systems, you may need to bleed the ABS module separately.
- Consult the Manual: Check if your vehicle requires ABS module bleeding and the procedure for it.
- ABS Scan Tool: Some vehicles require an ABS scan tool to activate the ABS pump and valves. This tool is essential for ensuring all air is purged from the ABS module.
Step 5: Test the Brake Pedal
- Firmness Test: After bleeding all four wheels and the ABS module (if applicable), test the brake pedal for firmness. It should feel firm and responsive.
- Top Up Fluid: Ensure the brake fluid is at the correct level and replace the reservoir cap.
Step 6: Reassemble and Test Drive
- Reinstall Wheels: Reattach the wheels and lower the vehicle from the jack stands.
- Final Check: Double-check that all bleeder screws are tight and there are no leaks.
- Test Drive: Perform a careful test drive to ensure the brakes are functioning correctly. Start at low speeds and gradually increase to ensure the ABS system is operational.
Troubleshooting Tips
- Spongy Pedal: If the brake pedal remains spongy, there may still be air in the system. Repeat the bleeding process, focusing on the ABS module.
- Brake Fluid Leaks: Inspect all connections for leaks. Tighten any loose connections and replace damaged components if necessary.
- ABS Warning Light: If the ABS warning light stays on after bleeding, there may be an issue with the ABS system. Consult a professional mechanic if needed.
Maintenance Tips for ABS Brakes
- Regular Inspections: Regularly check brake fluid levels and inspect for leaks.
- Fluid Quality: Use the recommended brake fluid and replace it as per your vehicle’s maintenance schedule.
- Professional Help: If you’re unsure about any part of the bleeding process, seek help from a professional mechanic to avoid compromising your vehicle’s safety.
Conclusion
Bleeding ABS brakes might seem daunting, but with the right tools, preparation, and following the steps outlined in this guide, you can ensure your braking system is free of air and functioning optimally. Regular maintenance and proper bleeding procedures will keep your ABS brakes reliable and safe for years to come. Always prioritize safety and consult your vehicle’s manual for specific instructions related to your ABS system.
By taking the time to bleed your ABS brakes correctly, you’re not only enhancing your vehicle’s performance but also ensuring your safety and that of others on the road.