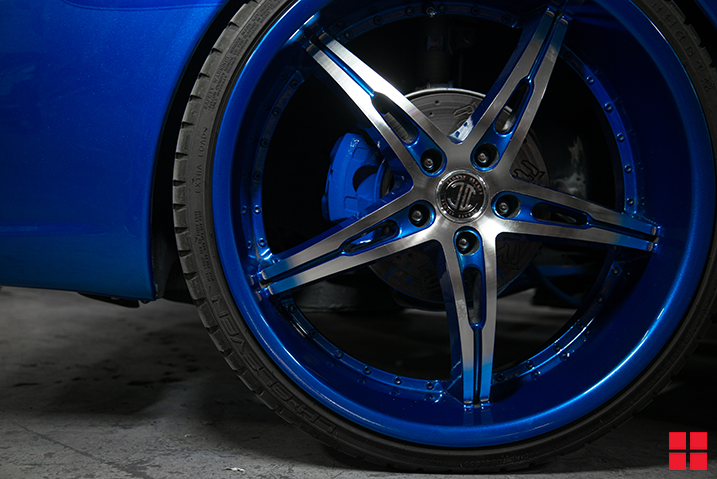
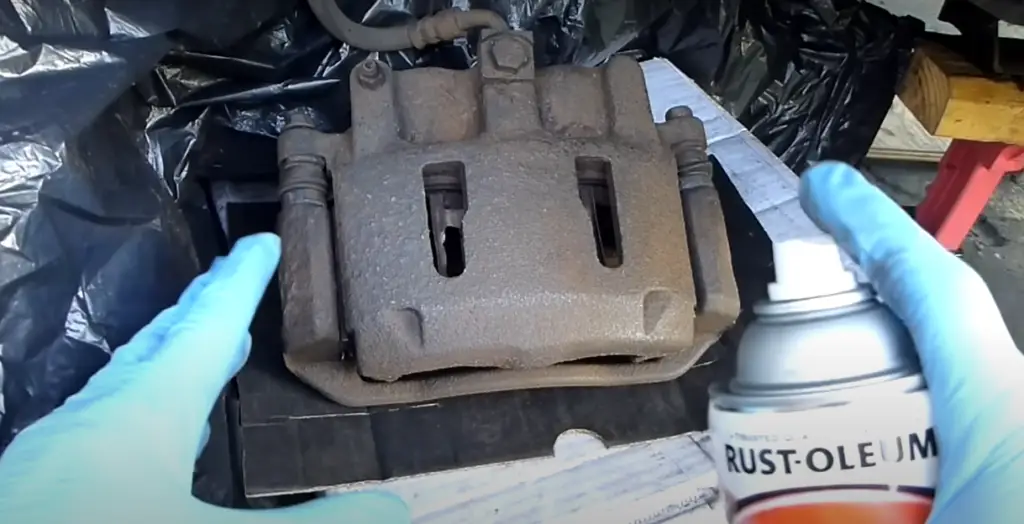
To paint brake calipers, start by cleaning and sanding the calipers before applying heat-resistant paint for a durable finish. This simple process can add a pop of color to your vehicle and protect the calipers from rust and corrosion.
Painting your brake calipers is one of the most affordable and effective ways to add a personalized touch to your vehicle. Not only does it enhance the aesthetics by making the wheels look sportier, but it can also protect your calipers from corrosion. Whether you’re going for a subtle or bold look, painting your calipers at home can save you hundreds of dollars compared to a professional service.
This guide will take you through the process step-by-step, providing all the necessary tips, tools, and precautions to ensure a professional-looking finish.

Credit: www.rustoleum.com
Contents
- 1 Why Paint Brake Calipers?
- 2 How to Paint Brake Calipers
- 2.1 Step-by-Step Guide to Painting Brake Calipers
- 2.1.1 1. Preparation and Safety First
- 2.1.2 2. Jack Up the Car and Remove the Wheels
- 2.1.3 3. Clean the Calipers Thoroughly
- 2.1.4 4. Sand the Calipers
- 2.1.5 5. Mask Off the Surrounding Areas
- 2.1.6 6. Apply Primer (Optional but Recommended)
- 2.1.7 7. Paint the Calipers
- 2.1.8 8. Let the Paint Dry
- 2.1.9 9. Apply Decals (Optional)
- 2.1.10 10. Reinstall the Wheels
- 2.2 Tips and Tricks for a Professional Painting Finish
- 2.1 Step-by-Step Guide to Painting Brake Calipers
- 3 Frequently Asked Questions
- 4 Conclusion
Why Paint Brake Calipers?
Painting brake calipers is a popular modification among car enthusiasts for several reasons:
- Aesthetic Appeal: Painting your brake calipers can make your car look sportier or more refined, depending on the color choice.
- Protection: High-quality brake caliper paint can provide a protective layer that helps guard against rust, dirt, and road grime.
- Customization: It’s an easy way to give your car a unique, personalized look without spending a fortune.
- Cost Savings: Painting your brake calipers yourself can save you significant labor costs compared to having it done at an auto shop.
How to Paint Brake Calipers
Before starting the project, make sure you have the following tools and materials ready:
- Brake caliper paint kit (many auto parts stores sell specific kits for this purpose)
- High-temperature paint (available in spray or brush form, designed for automotive parts)
- Primer (optional but recommended for better adhesion)
- Brake cleaner (or degreaser)
- Masking tape and plastic bags (for protecting the surrounding area)
- Sandpaper (120-320 grit for scuffing surfaces)
- Wire brush (to remove rust and dirt)
- Jack and jack stands (to lift the vehicle safely)
- Socket wrench set (to remove the wheels)
- Painters’ gloves and safety goggles
- Rubbing alcohol (for surface prep)
- Caliper decals (optional, if you want to add a logo)
Step-by-Step Guide to Painting Brake Calipers
Painting brake calipers is a DIY project that can significantly enhance the appearance of your vehicle while offering protection against rust and wear. Here’s a detailed step-by-step guide to help you achieve a professional-looking finish.
1. Preparation and Safety First
Before diving into the painting process, ensure your work area is clean, well-ventilated, and safe. You’ll need enough space to jack up your car and remove the wheels. Wear safety goggles and gloves to protect yourself from dust, chemicals, and fumes.
2. Jack Up the Car and Remove the Wheels
Use your car jack to lift the vehicle, then secure it with jack stands. After making sure the car is stable, use a socket wrench to remove the lug nuts and take off the wheels. This gives you full access to the brake calipers.
3. Clean the Calipers Thoroughly
Dirty or greasy calipers will prevent the paint from adhering properly. Spray the calipers with a brake cleaner or degreaser, ensuring that all oil, dust, and grime are removed. You can use a wire brush to scrape away any rust or stubborn dirt, followed by a wipe-down with a clean cloth and rubbing alcohol.
4. Sand the Calipers
Using sandpaper, lightly sand the surface of the brake calipers. This step will create a rough texture for the paint to adhere to. Focus on removing any remaining rust or imperfections. After sanding, wipe the calipers again with rubbing alcohol or a clean cloth to ensure a dust-free surface.
5. Mask Off the Surrounding Areas
Use masking tape and plastic bags to protect areas you don’t want to paint, such as the brake pads, rotors, brake lines, and nearby suspension components. Be meticulous with the masking process, as overspray or unwanted paint can compromise the functionality of these parts.
6. Apply Primer (Optional but Recommended)
Applying a primer is recommended, especially if you’re painting over raw metal. Primer will enhance the paint’s adhesion and durability. Make sure to choose a high-temperature primer designed for automotive parts. Spray a thin, even coat and let it dry for the time specified on the can (usually 10-15 minutes).
7. Paint the Calipers
Now it’s time to paint! Whether you’re using a brush-on or spray paint, ensure the paint is specifically designed for high-temperature applications. Follow these steps:
- Spray Paint: If using spray paint, shake the can thoroughly for about 2-3 minutes. Apply light, even coats, holding the can about 8-10 inches from the caliper. Avoid heavy coats to prevent drips and runs. Let each coat dry for at least 10 minutes before applying the next one. Typically, 2-3 coats are sufficient.
- Brush-on Paint: If you’re using a brush-on caliper paint, apply thin, even layers with a small, high-quality paintbrush. Allow each layer to dry before applying the next. This method reduces the risk of overspray and can offer more control over the application.
Whichever method you choose, ensure the paint coverage is smooth and even.
8. Let the Paint Dry
Allow the paint to dry for at least 24 hours before handling the brake calipers or driving the car. This is essential to ensure the paint cures properly and doesn’t chip or peel. Be patient — rushing the process can ruin the finish.
9. Apply Decals (Optional)
If you’ve purchased brake caliper decals (such as logos or brand names), you can apply them once the paint has fully dried. Make sure the caliper surface is clean and dry before applying the decals.
10. Reinstall the Wheels
Once the paint is fully dry and the calipers are ready, carefully remove the masking tape and plastic bags. Reattach the wheels, tightening the lug nuts with a socket wrench. Afterward, lower the car back to the ground.

Tips and Tricks for a Professional Painting Finish
Achieving a professional finish when painting brake calipers requires attention to detail, patience, and the right techniques. Here are some tips and tricks to help you get the best results:
- Patience is key: Take your time, especially with the prep work. The cleaner and smoother the caliper surface, the better the paint will adhere and last.
- Don’t rush the drying process: While it may be tempting to reassemble everything quickly, allowing enough time for the paint to dry and cure is essential for a durable finish.
- Avoid regular spray paint: Using regular spray paint instead of high-temperature caliper paint can result in bubbling, chipping, and discoloration due to the intense heat generated by the brakes.
- Choose your color wisely: While red, black, and yellow are popular choices for caliper paint, consider the overall color scheme of your car. Bright colors may fade more quickly over time.
- Maintain the calipers: After painting, regular cleaning with soap and water can help maintain the finish and prevent brake dust buildup.
Frequently Asked Questions
Here are some FAQs about painting brake calipers –
1. How long does it take to paint brake calipers?
The entire process typically takes around 6-8 hours, depending on how thorough your preparation is and how many coats of paint you apply. However, you should allow 24 hours for the paint to fully cure before driving.
2. Can I paint the calipers without removing them from the car?
Yes, you can paint the calipers without removing them entirely, but you will need to remove the wheels. Be sure to carefully mask off surrounding areas to avoid getting paint on components like brake pads or rotors.
3. How long will the painted calipers last?
When done correctly, painted calipers can last several years, especially if you use high-quality, heat-resistant caliper paint and apply it correctly. Regular cleaning will help maintain the finish.
4. Do I need to use a primer?
Using a primer is optional but highly recommended. It improves paint adhesion and increases durability, especially if you’re painting over bare metal or a previously rusted surface.
5. Is it possible to change the color after painting them once?
Yes, you can repaint your calipers if you want to change the color. You will need to repeat the same cleaning and preparation process to ensure proper adhesion of the new paint.
Conclusion
Painting your brake calipers is a simple and cost-effective way to give your vehicle a custom look. With the right tools, preparation, and a bit of patience, you can achieve a professional finish that not only enhances the appearance but also provides added protection to your calipers. Follow the steps carefully, and soon you’ll be cruising with a fresh, stylish set of brake calipers that stand out on the road.