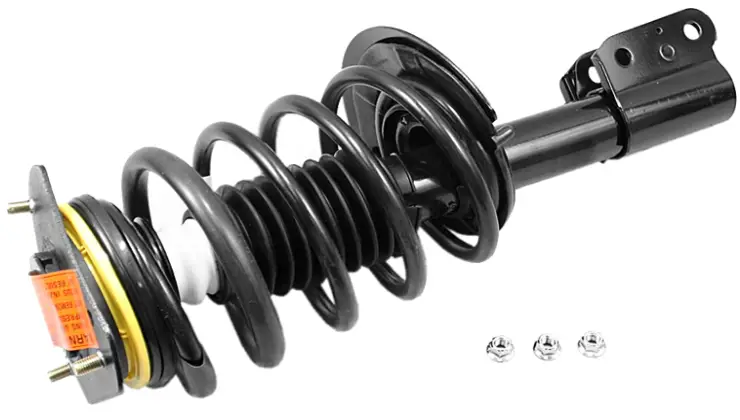
Are you looking to improve the vehicle’s suspension performance or install aftermarket components? Rotating the struts 180 degrees can be a valuable technique to achieve better handling and adjust ride height. In this comprehensive guide, we will provide step-by-step instructions on how to rotate strut 180 degrees and essential tips along the way.
Contents
Importance of Strut Rotation
Strut rotation involves turning the strut assembly by 180 degrees, effectively changing its orientation. This technique can have several advantages, including:
Improved Suspension Geometry: Rotating the struts can optimize suspension geometry, enhancing stability and handling characteristics of the vehicle.
Adjustable Ride Height: By rotating the struts, you can fine-tune the ride height, allowing for customization and accommodating different wheel and tire combinations.
Alignment Corrections: Strut rotation can help correct alignment issues caused by modifications or changes in vehicle specifications.
Enhanced Performance: Properly rotated struts can contribute to better weight distribution and improved overall performance.
How to Rotate Strut 180 Degrees: Step-by-Step Guide
Follow these step-by-step instructions to rotate the struts 180 degrees effectively:
Step 1: Gather the Necessary Tools and Equipment
- Ensure you have the required tools, including a jack, jack stands, socket set, wrenches, and torque wrenches.
- Use safety equipment such as gloves and eye protection.
Step 2: Lift the Vehicle
- Locate the jacking points recommended by the vehicle’s manufacturer.
- Safely lift the vehicle using a jack and secure it with jack stands for stability.
Step 3: Remove the Wheels
- Loosen the lug nuts while the vehicle is still on the ground.
- Once lifted, remove the lug nuts and wheels completely.
Step 4: Support the Suspension
- Use a floor jack to support the suspension components near the strut assembly.
- This prevents the suspension from drooping too far when the struts are disconnected.
Step 5: Disconnect the Strut Assembly
- Locate the bolts connecting the strut assembly to the steering knuckle and the upper mount.
- Use the appropriate tools to remove these bolts and detach the strut assembly.
Step 6: Rotate the Strut Assembly
- Carefully rotate the strut assembly 180 degrees to change its orientation.
- Take note of any alignment marks or indicators that may guide you during reinstallation.
Step 7: Reinstall the Strut Assembly
- Align the strut assembly with the steering knuckle and upper mount.
- Use the torque wrench to tighten the bolts according to the manufacturer’s specifications.
Step 8: Repeat for Other Struts
- Repeat the process for the remaining struts, ensuring consistent rotation for all four corners of the vehicle.
Step 9: Lower the Vehicle
- Carefully lower the vehicle using the jack until it rests securely on the ground.
Step 10: Test and Fine-Tune
- Take the vehicle for a test drive to assess the effects of the strut rotation.
- If necessary, fine-tune the ride height or alignment with professional assistance.
Frequently Asked Questions
Here are some frequently asked questions related to rotating struts:
Q: Can I rotate my struts on any vehicle?
A: The feasibility of rotating struts may vary depending on the specific vehicle and suspension setup. It is recommended to consult the vehicle’s manual or seek professional advice to determine if strut rotation is applicable to the vehicle.
Q: Do I need any special tools to rotate struts?
A: While basic hand tools are typically sufficient, certain vehicles may require specialized tools for strut removal and installation. It is recommended to have a socket set, wrenches, a torque wrench, and a floor jack for supporting the suspension.
Q: How often should I rotate my struts?
A: Strut rotation is not a routine maintenance procedure. It is usually performed when modifications are made to the suspension system or when alignment issues arise. Refer to the vehicle’s manual or consult with a professional for specific recommendations.
Q: Are there any risks associated with rotating struts?
A: Rotating struts, if done incorrectly, can adversely affect vehicle handling, suspension performance, and safety. Improper installation or alignment may lead to issues such as poor ride quality, premature tire wear, and compromised stability. It is crucial to follow proper procedures or seek professional assistance to mitigate these risks.
Q: Can I rotate the struts on one side of the vehicle only?
A: It is generally recommended to rotate the struts on all four corners of the vehicle to maintain balance and ensure consistent suspension geometry. Rotating the struts on only one side may lead to uneven weight distribution and handling issues.
Q: Can I rotate the struts without disassembling other suspension components?
A: The extent of disassembly required for strut rotation may vary depending on the vehicle’s design. In some cases, only the strut assembly needs to be disconnected and rotated, while in others, additional components may need to be removed. It is essential to follow the manufacturer’s instructions or consult a professional to determine the specific requirements for the vehicle.
Conclusion
Rotating the struts 180 degrees can be a valuable technique to optimize suspension geometry, adjust ride height, and improve overall performance. By following the step-by-step guide and considering the provided FAQs, you can confidently undertake the process or make an informed decision about seeking professional assistance. Remember to consult the vehicle’s manual and consider the specific requirements of the vehicle to ensure a successful strut rotation that enhances the driving experience.
